
Bài viết hướng dẫn tạo một Gutenberg Block Plugin có tên là Affiliate Block. Block này gồm 2 cột một bên là hình ảnh bên trái và một đoạn text bên phải, và thêm một button tùy chỉnh link liên kết bên dưới text.

Bắt đầu thôi!
Bước 1: Tạo một Gutenberg Block Plugin
Đầu tiên vào thư mục /wp-content/plugins và chạy lệnh
npx @wordpress/create-block my-affiliate-blockLệnh trên sẽ chạy và tạo ra một thư mục plugin my-affiliate-block.
Để hiểu hơn cách hoạt động của lệnh command trên có thể xem thêm : Tạo Custom Block Gutenberg trong WordPress
Sau khi cài đặt xong để chạy được plugin bạn lần lượt thực hiện như sau:
+ Chạy lệnh cd đển thư mục plugin này
cd my-affiliate-block+ Khởi động môi trường devlopment bằng lệnh
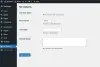
npm start+ Vào nơi quản lý Plugin trong WordPress và active nó
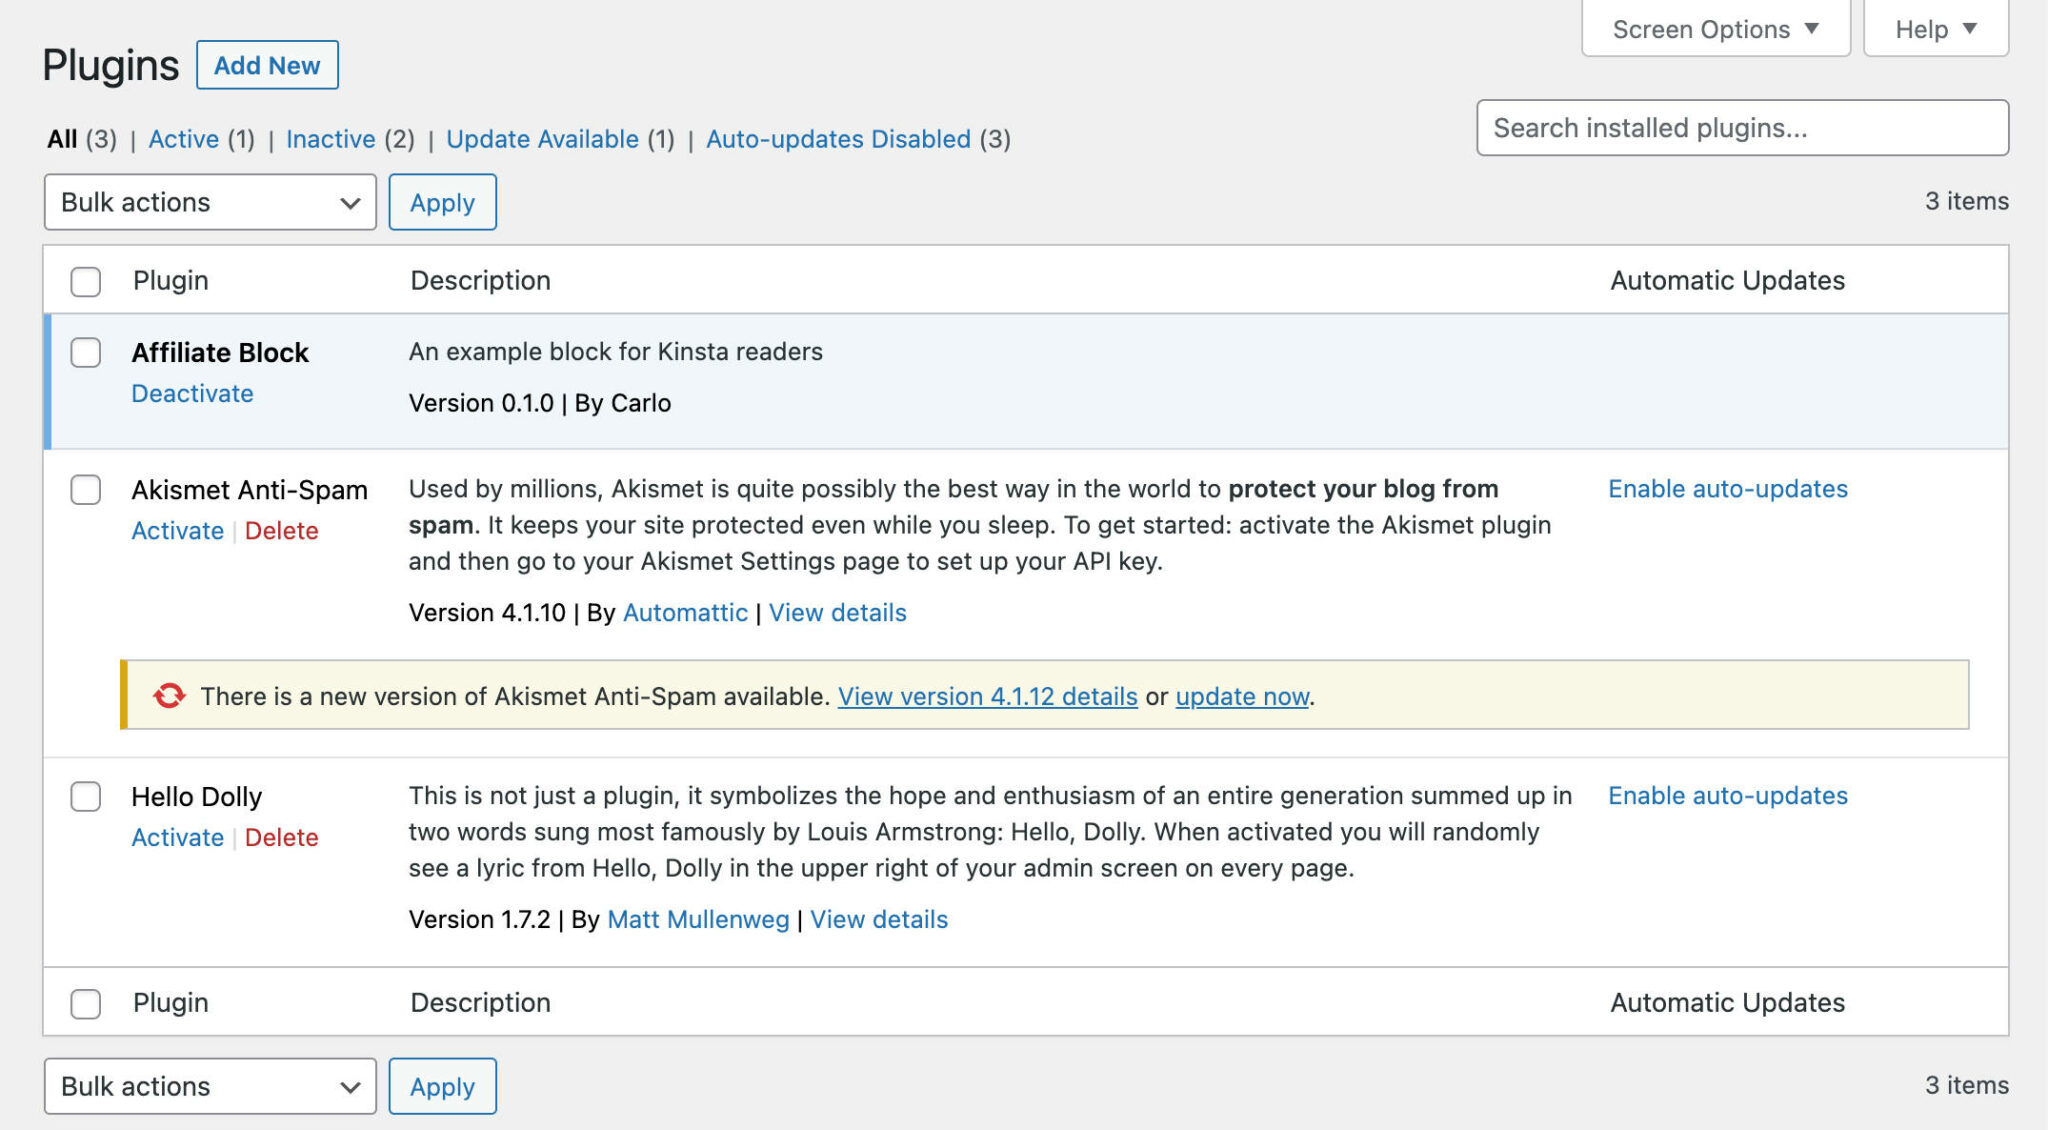
+ Sau khi active block plugin, bạn hãy đến tạo mới một post và mở block inserter và kéo xuống để thấy được block "Affiliate Block" như hình
Bước 2 : Khám phá cấu trúc của Gutenberg Block Plugin
2.1. File my-affiliate-block.php - Khai báo một block type
Để khai báo Block Type bằng hàm register_block_type để nhận lấy metadata về block trong file block.json.
<?php
/**
 * Plugin Name:       My Affiliate Block
 * Description:       Example block written with ESNext standard and JSX support – build step required.
 * Requires at least: 5.8
 * Requires PHP:      7.0
 * Version:           0.1.0
 * Author:            The WordPress Contributors
 * License:           GPL-2.0-or-later
 * License URI:       https://www.gnu.org/licenses/gpl-2.0.html
 * Text Domain:       my-affiliate-block
 *
 * @package           create-block
 */

/**
 * Registers the block using the metadata loaded from the `block.json` file.
 * Behind the scenes, it registers also all assets so they can be enqueued
 * through the block editor in the corresponding context.
 *
 * @see https://developer.wordpress.org/reference/functions/register_block_type/
 */
function create_block_my_affiliate_block_block_init() {
	register_block_type( __DIR__ . '/build' );
}
add_action( 'init', 'create_block_my_affiliate_block_block_init' );
2.2. File package.json - Nơi lưu thông tin dependency của projects và lệnh script
devDependencies @wordpress/scripts là mặc định, nếu bạn cần thêm các packages thì đây sẽ là nơi lưu giữ thông tin đó.
Trong phạm vi bài viết chỉ dùng 2 lệnh script cơ bản:
npm run build— tạo file build cho projectnpm run start— tạo file development cho project
2.3. File block.json - Nơi lưu thông tin của Gutenberg Block Plugin
{
	"$schema": "https://schemas.wp.org/trunk/block.json",
	"apiVersion": 2,
	"name": "create-block/my-affiliate-block",
	"version": "0.1.0",
	"title": "My Affiliate Block",
	"category": "widgets",
	"icon": "smiley",
	"description": "Example block written with ESNext standard and JSX support – build step required.",
	"supports": {
		"html": false
	},
	"textdomain": "my-affiliate-block",
	"editorScript": "file:./index.js",
	"editorStyle": "file:./index.css",
	"style": "file:./style-index.css"
}apiVersion— phiên bản API được block sử dụng (phiên bản hiện tại là 2)name— một tên định danh duy nhất cho một blockversion— phiên bản hiện tại của blocktitle— một tiêu đề hiển thị cho blockcategory— a block categoryicon— là biểu tượng của block, xem thêm tại Dashicon. ( Có thể custom một icon svg)description— mô tả về blocksupports— là option để kiểm soát tính năng trong editoreditorScript— đường đẫn file scripteditorStyle— đường đẫn file stylestyle— cung cấp các style khác cho block
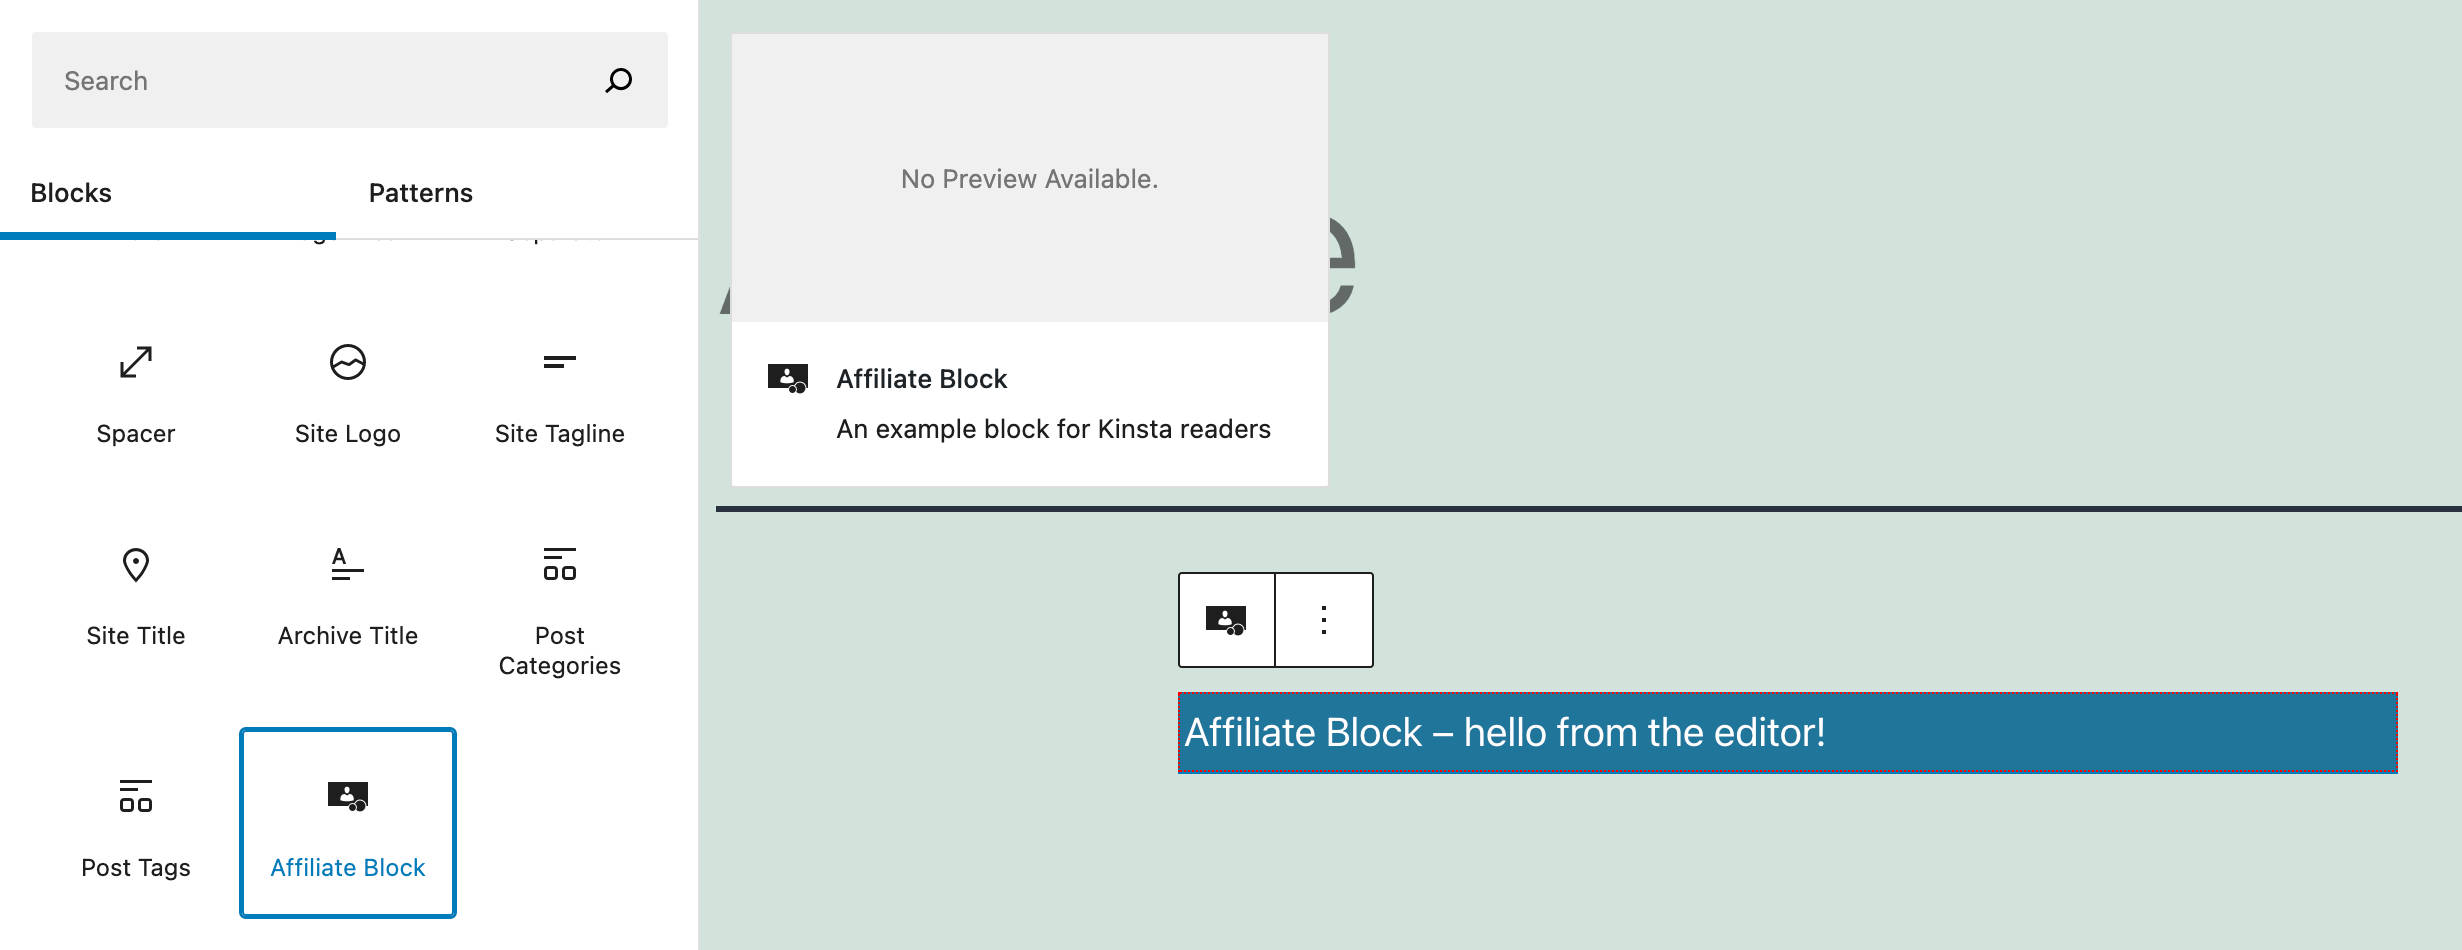
2.4. Folder src - Nơi chứa code của Gutenberg Block Plugin
Gồm lần lượt các file:
+ index.js : sẽ là file bắt đầu, nơi bạn import các dependencies và đăng ký block type.
+ edit.js: là nơi bạn xây dựng giao diện cho block trong editor.
+ save.js: nơi bạn xử lý dữ liệu khi save block vào database.
+ editor.scss: là nơi chứa style cho block trong editor.
+ style.scss: là nơi chưa style cho block ở front-end, giao diện người dùng.
2.5. Folder node_modules - Nơi chứa các packages bạn khai báo trong package.json
2.6. Folder build sử dụng khi bạn dùng lệnh build cho block plugin
Bước 3 : Thêm tham số cho block.json
Ta thay đổi nội dung block.json như sau
{
	"$schema": "https://schemas.wp.org/trunk/block.json",
	"apiVersion": 2,
	"name": "create-block/my-affiliate-block",
	"version": "0.1.0",
	"title": "My Affiliate Block",
	"category": "widgets",
	"icon": "money",
	"keywords": [ "kinsta", "affiliate", "money" ],
	"description": "Example block written with ESNext standard and JSX support – build step required.",
	"supports": {
		"html": false
	},
	"textdomain": "my-affiliate-block",
	"editorScript": "file:./index.js",
	"editorStyle": "file:./index.css",
	"style": "file:./style-index.css"
}
Trong đó, ta thay đổi icon là money.
keywords là array chứa các từ khóa mà khi nhập vào input sẽ xuất hiện block này, điều này giúp ta nhanh tìm ra block của mình trong Block Inserter.

Bước 4 : Cài đặt thêm các packages
Sử dụng lệnh command npm install @wordpress/i18n để lần lượt cài đặt các packages khác @wordpress/block-editor, @wordpress/blocks. Lúc này file package.json sẽ như thế này:
{
	"name": "my-affiliate-block",
	"version": "0.1.0",
	"description": "Example block written with ESNext standard and JSX support – build step required.",
	"author": "The WordPress Contributors",
	"license": "GPL-2.0-or-later",
	"main": "build/index.js",
	"scripts": {
		"build": "wp-scripts build",
		"format": "wp-scripts format",
		"lint:css": "wp-scripts lint-style",
		"lint:js": "wp-scripts lint-js",
		"packages-update": "wp-scripts packages-update",
		"plugin-zip": "wp-scripts plugin-zip",
		"start": "wp-scripts start"
	},
	"devDependencies": {
		"@wordpress/scripts": "^22.1.0"
	},
	"dependencies": {
		"@wordpress/block-editor": "^8.2.0",
		"@wordpress/blocks": "^11.2.2",
		"@wordpress/i18n": "^4.3.1"
	}
}
Bước 5: Import các components từ packages
5.1. Mở file edit.js thay đổi import useBlockProps và RichText
import { useBlockProps } from '@wordpress/block-editor';
// Thay thành
import { useBlockProps, RichText } from '@wordpress/block-editor';
Chú ý nếu xóa useBlockProps block của bạn sẽ không được truy cập vào function và style mà chỉ hiển thị text đơn thuần.
RichText component cho phép bạn chỉnh sử và định dạnh nội dung của block. Bạn xem thêm tại đây RichText Component.
5.2. Thay đổi return block bằng component RichText
export default function Edit() {
	const blockProps = useBlockProps();

	return (
		<RichText
			{ ...blockProps }
			tagName="p"
			onChange={ onChangeContent }
			allowedFormats={ [ 'core/bold', 'core/italic' ] }
			value={ attributes.content }
			placeholder={ __( 'Write your text...' ) }
		/>
	);
}
tagName - tên thẻ của phần tử HTML có thể chỉnh sửa
onChange - function được gọi khi nội dung của phần tử thay đổi
allowFormats - một mảng các định dạng được phép. Theo mặc định, tất cả các định dạng đều được phép
value - chuỗi HTML để có thể chỉnh sửa
5.3 Xác định các thuộc tính cần thiết trong file block.json
Các thuộc tính cung cấp thông tin về dữ liệu lưu trữ của block, chẳng hạn như nội dung, màu nền, URL, v.v.
Bạn có thể để một số thuộc tính tùy ý trong object bằng các cặp key/value, trong đó key là tên thuộc tính và value là định nghĩa thuộc tính.
Bây giờ, hãy mở tệp block.json và thêm các thuộc tính prop sau:
"attributes": {
	"content": {
		"type": "string",
		"source": "html",
		"selector": "p"
	}
},
Thuộc tính content cho phép lưu trữ văn bản do người dùng nhập vào trường có thể chỉnh sửa:
- Type cho biết loại dữ liệu được lưu trữ bởi thuộc tính. Kiểu này là bắt buộc trừ khi bạn xác định thuộc tính là enum.
- source định nghĩa cách giá trị thuộc tính được trích lấy từ nội dung bài đăng. Trong ví dụ này, đó là nội dung HTML. Lưu ý rằng nếu bạn không cung cấp thuộc tính source, dữ liệu sẽ được lưu trữ trong dấu phân cách khối (đọc thêm).
- selector là thẻ HTML hoặc bất kỳ selector khác, chẳng hạn như class hoặc thuộc tính id.
Chúng ta sẽ chuyển cho function Edit một object của các thuộc tính. Vì vậy, hãy quay lại file edit.js và thực hiện thay đổi sau:
export default function Edit( { attributes, setAttributes } ) { ... }5.4. Khai báo event Handlers - hàm xử lý sự kiện
Phần tử RichText có thuộc tính onChange, cung cấp một hàm để gọi khi nội dung của phần tử thay đổi.
Hãy xác định chức năng đó và xem toàn bộ file edit.js:
import { __ } from '@wordpress/i18n';
import { useBlockProps, RichText } from '@wordpress/block-editor';
import './editor.scss';

export default function Edit( { attributes, setAttributes } ) {
	const blockProps = useBlockProps();

	const onChangeContent = ( newContent ) => {
		setAttributes( { content: newContent } )
	}

	return (
		<RichText
			{ ...blockProps }
			tagName="p"
			onChange={ onChangeContent }
			allowedFormats={ [ 'core/bold', 'core/italic' ] }
			value={ attributes.content }
			placeholder={ __( 'Write your text...' ) }
		/>
	);
}
Bây giờ hãy lưu file và chạy npm run start trong terminal . Sau đó, quay lại bảng điều khiển WordPress của bạn, tạo một bài đăng hoặc trang mới và thêm Affiliate block:
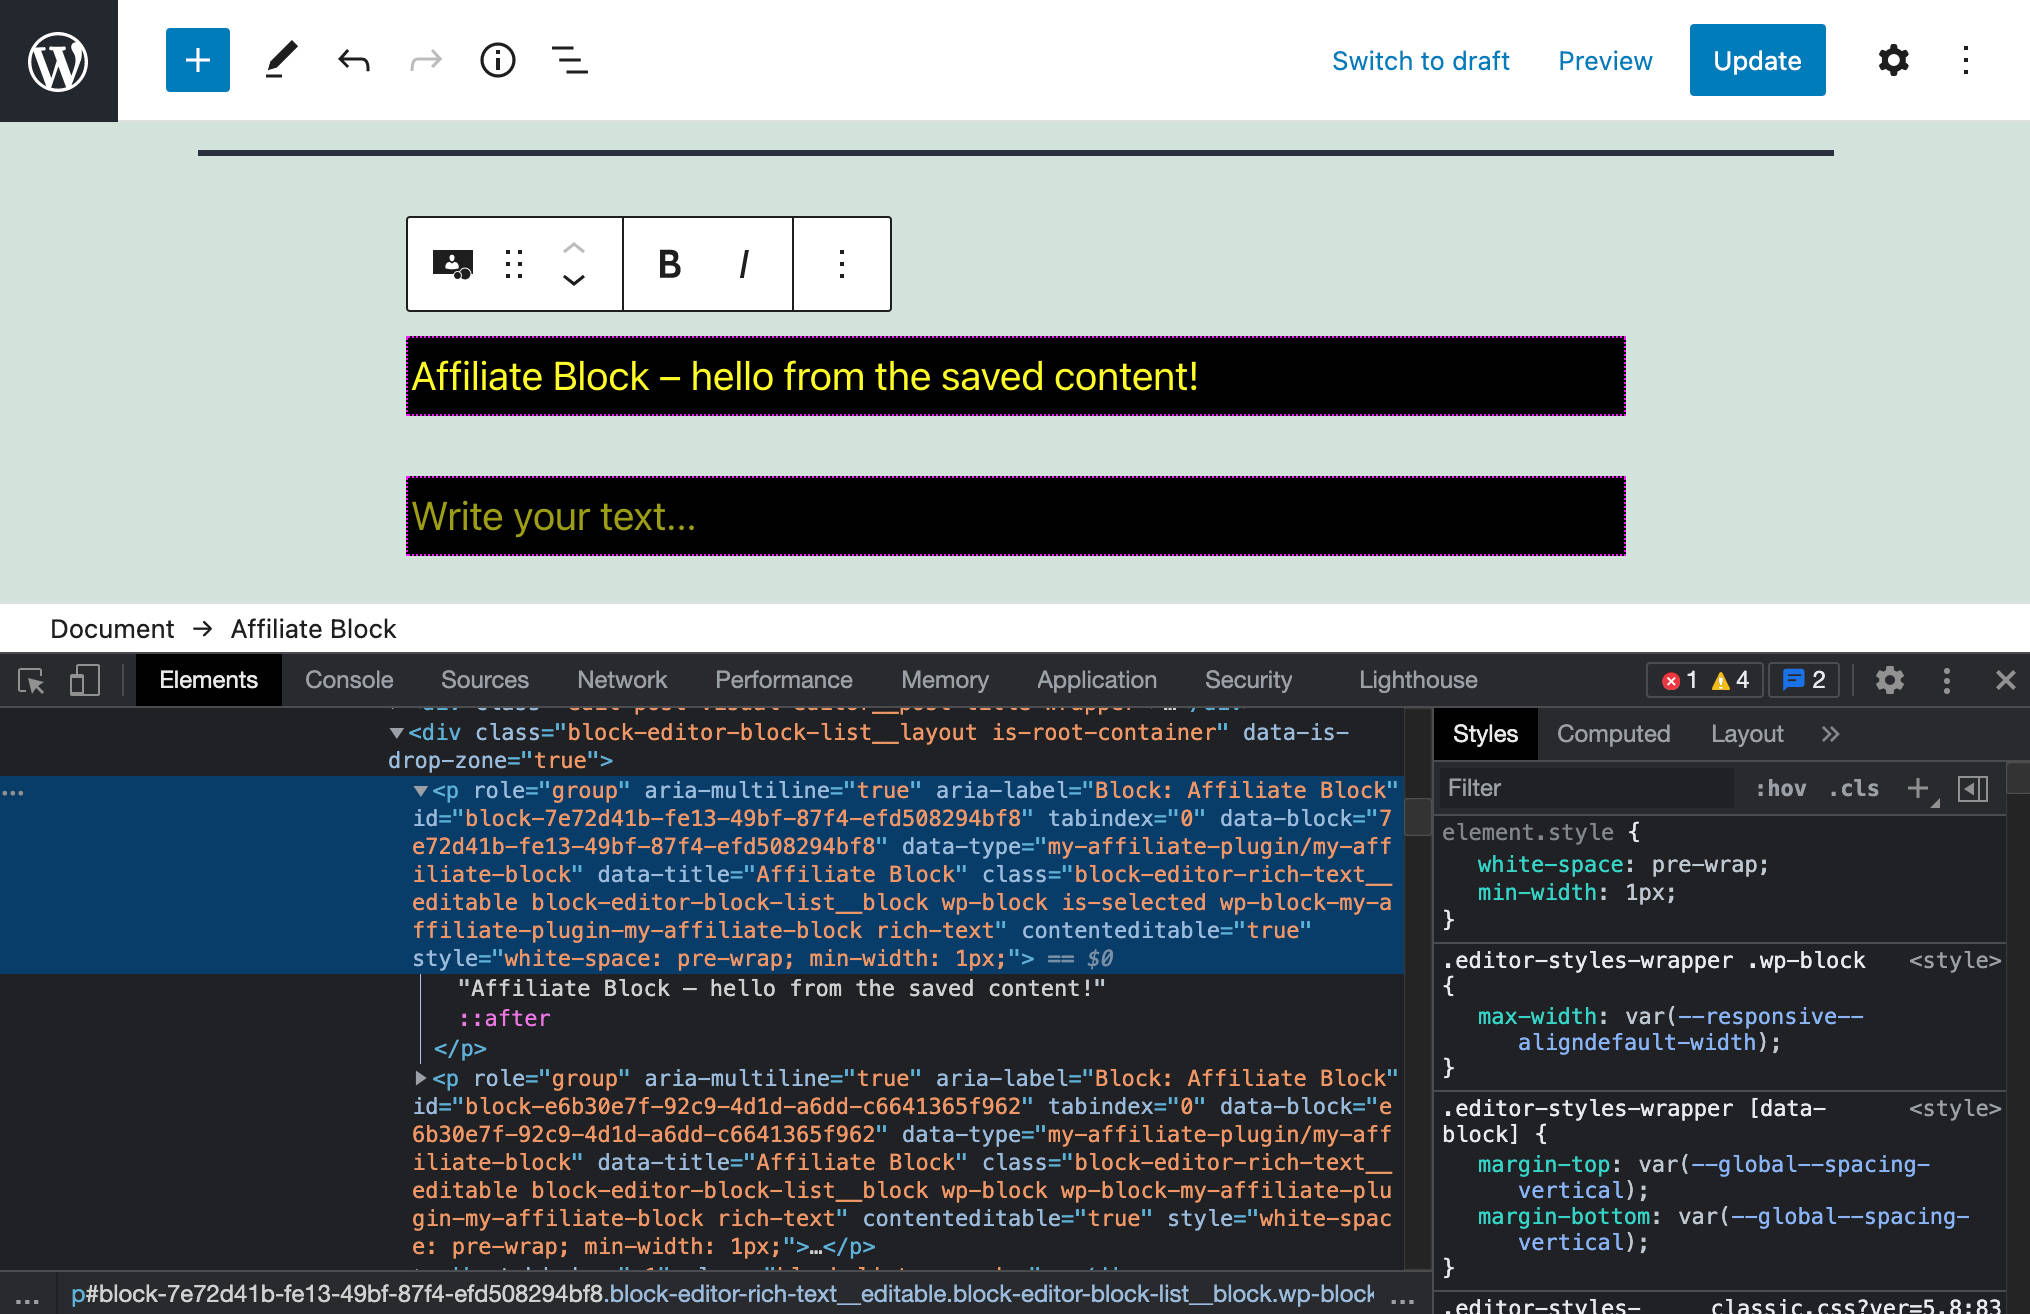
Thêm một số text và chuyển sang Chế độ xem code . Đây là mã của bạn sẽ trông như thế này:
<!-- wp:my-affiliate-plugin/my-affiliate-block -->
<p class="wp-block-my-affiliate-plugin-my-affiliate-block">This is my first editable Gutenberg block ?</p>
<!-- /wp:my-affiliate-plugin/my-affiliate-block -->
Nếu bây giờ bạn lưu trang và kiểm tra kết quả từ giao diện người dùng, bạn có thể hơi thất vọng vì những thay đổi của bạn không ảnh hưởng đến trang web.
Đó là vì bạn phải sửa đổi file save.js để lưu trữ thông tin nhập của người dùng trong cơ sở dữ liệu khi bài đăng được lưu.
5.5. Lưu dữ liệu block
Bây giờ mở file save.js và thay đổi scripts như bên dưới
import { __ } from '@wordpress/i18n';
import { useBlockProps, RichText } from '@wordpress/block-editor';

export default function save( { attributes } ) {
	const blockProps = useBlockProps.save();
	return (
		<RichText.Content
			{ ...blockProps }
			tagName="p"
			value={ attributes.content }
		/>
	);
}
Giải thích cho đoạn code ở đây:
- Import component RichText từ block-editor.
- Chuyển một số thuộc tính thông qua một đối số object vào hàm lưu (trong ví dụ này, chúng tôi chỉ truyền thuộc tính thuộc tính attributes )
- Trả lại nội dung của component RichText
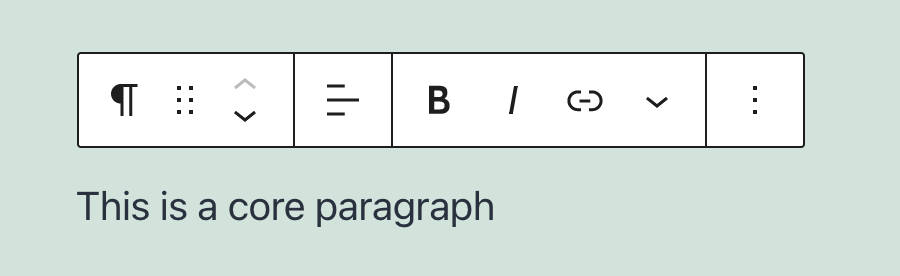
Bước 6: Thêm Block Toolbar cho Gutenberg Block Plugin
Block toolbar là nơi chứa một tập hợp các điều khiển cho phép người dùng thao tác các phần của nội dung block. Đối với mỗi điều khiển thanh công cụ, bạn sẽ tìm thấy một component:
6.1. Import BlockControls và AlignmentControl
Mở file edit.js và thêm :
import {
useBlockProps,
RichText,
AlignmentControl,
BlockControls
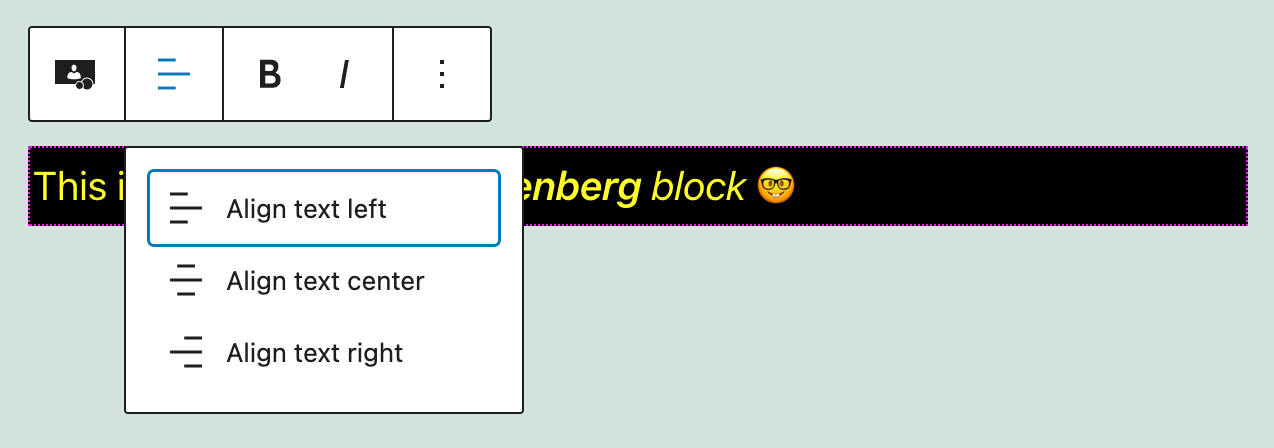
} from '@wordpress/block-editor';6.2. Thêm component BlockControls và AlignmentControl vào return
Trong cùng cấp bậc với RichText, ta thêm vào trong file edit.js như sau:
export default function Edit( { attributes, setAttributes } ) {
	const blockProps = useBlockProps();
	return (
		<>
			<BlockControls>
				<AlignmentControl
					value={ attributes.align }
					onChange={ onChangeAlign }
				/>
			</BlockControls>
			<RichText
				{ ...blockProps }
				tagName="p"
				onChange={ onChangeContent }
				allowedFormats={ [ 'core/bold', 'core/italic' ] }
				value={ attributes.content }
				placeholder={ __( 'Write your text...' ) }
				style={ { textAlign: attributes.align } }
			/>
		</>
	);
}
Trong đó <> và </> là cú pháp khai báo các đoạn React, giúp ta trả về nhiều phần tử trong React.
Trong ví dụ này, AlignmentControl có hai thuộc tính:
- Value cung cấp giá trị hiện tại cho phần tử
- onChange cung cấp một hàm xử lý sự kiện để chạy khi giá trị thay đổi
Chúng ta cũng đã xác định các thuộc tính bổ sung cho phần tử RichText.
6.3. Thêm thuộc tính align cho Block
Mở file block.js và thêm thuộc tính align
"align": {
	"type": "string",
	"default": "none"
}
Quay trở về terminal để chạy lệnh npm run start
Nhưng để sử dụng căn chỉnh Align thì cần phải thêm hàm xử lý event.
6.4. Thêm Event Handler cho align của Block
const onChangeAlign = ( newAlign ) => {
	setAttributes( {
		align: newAlign === undefined ? 'none' : newAlign,
	} )
}
và khi đó file edit.js sẽ trông như thế này
export default function Edit( { attributes, setAttributes } ) {
	const blockProps = useBlockProps();
	const onChangeContent = ( newContent ) => {
		setAttributes( { content: newContent } )
	}
	const onChangeAlign = ( newAlign ) => {
		setAttributes( {
			align: newAlign === undefined ? 'none' : newAlign,
		} )
	}
	return (
		<>
			<BlockControls>
				<AlignmentControl
					value={ attributes.align }
					onChange={ onChangeAlign }
				/>
			</BlockControls>
			<RichText
				{ ...blockProps }
				tagName="p"
				onChange={ onChangeContent }
				allowedFormats={ [ 'core/bold', 'core/italic' ] }
				value={ attributes.content }
				placeholder={ __( 'Write your text...' ) }
				style={ { textAlign: attributes.align } }
			/>
		</>
	);
}
6.5. Xử lý lưu trữ dữ liệu
Mở file save.js và thay đoạn bên dưới
export default function save( { attributes } ) {
	const blockProps = useBlockProps.save();
	const { content, align } = attributes;
	return (
		<RichText.Content
			{ ...blockProps }
			tagName="p"
			value={ content }
			style={ { textAlign: align } }
		/>
	);
}
Như vậy là chúng ta đã tạo thành công block toolbar cho block của mình.
Bước 7: Tạo Block Setting Sidebar cho Gutenberg Block Plugin
Bạn có thể tạo một block setting sidebar hoặc tạo một sidebar mới thông qua API InspectorControls.
Tương tự như bước 5,6. Bước 7 sẽ đi nhanh qua như sau.
7.1. Import InspectorControls và PanelColorSettings Components
Mở file edit.js và import thêm các components
import {
useBlockProps,
RichText,
AlignmentControl,
BlockControls,
InspectorControls,
PanelColorSettings
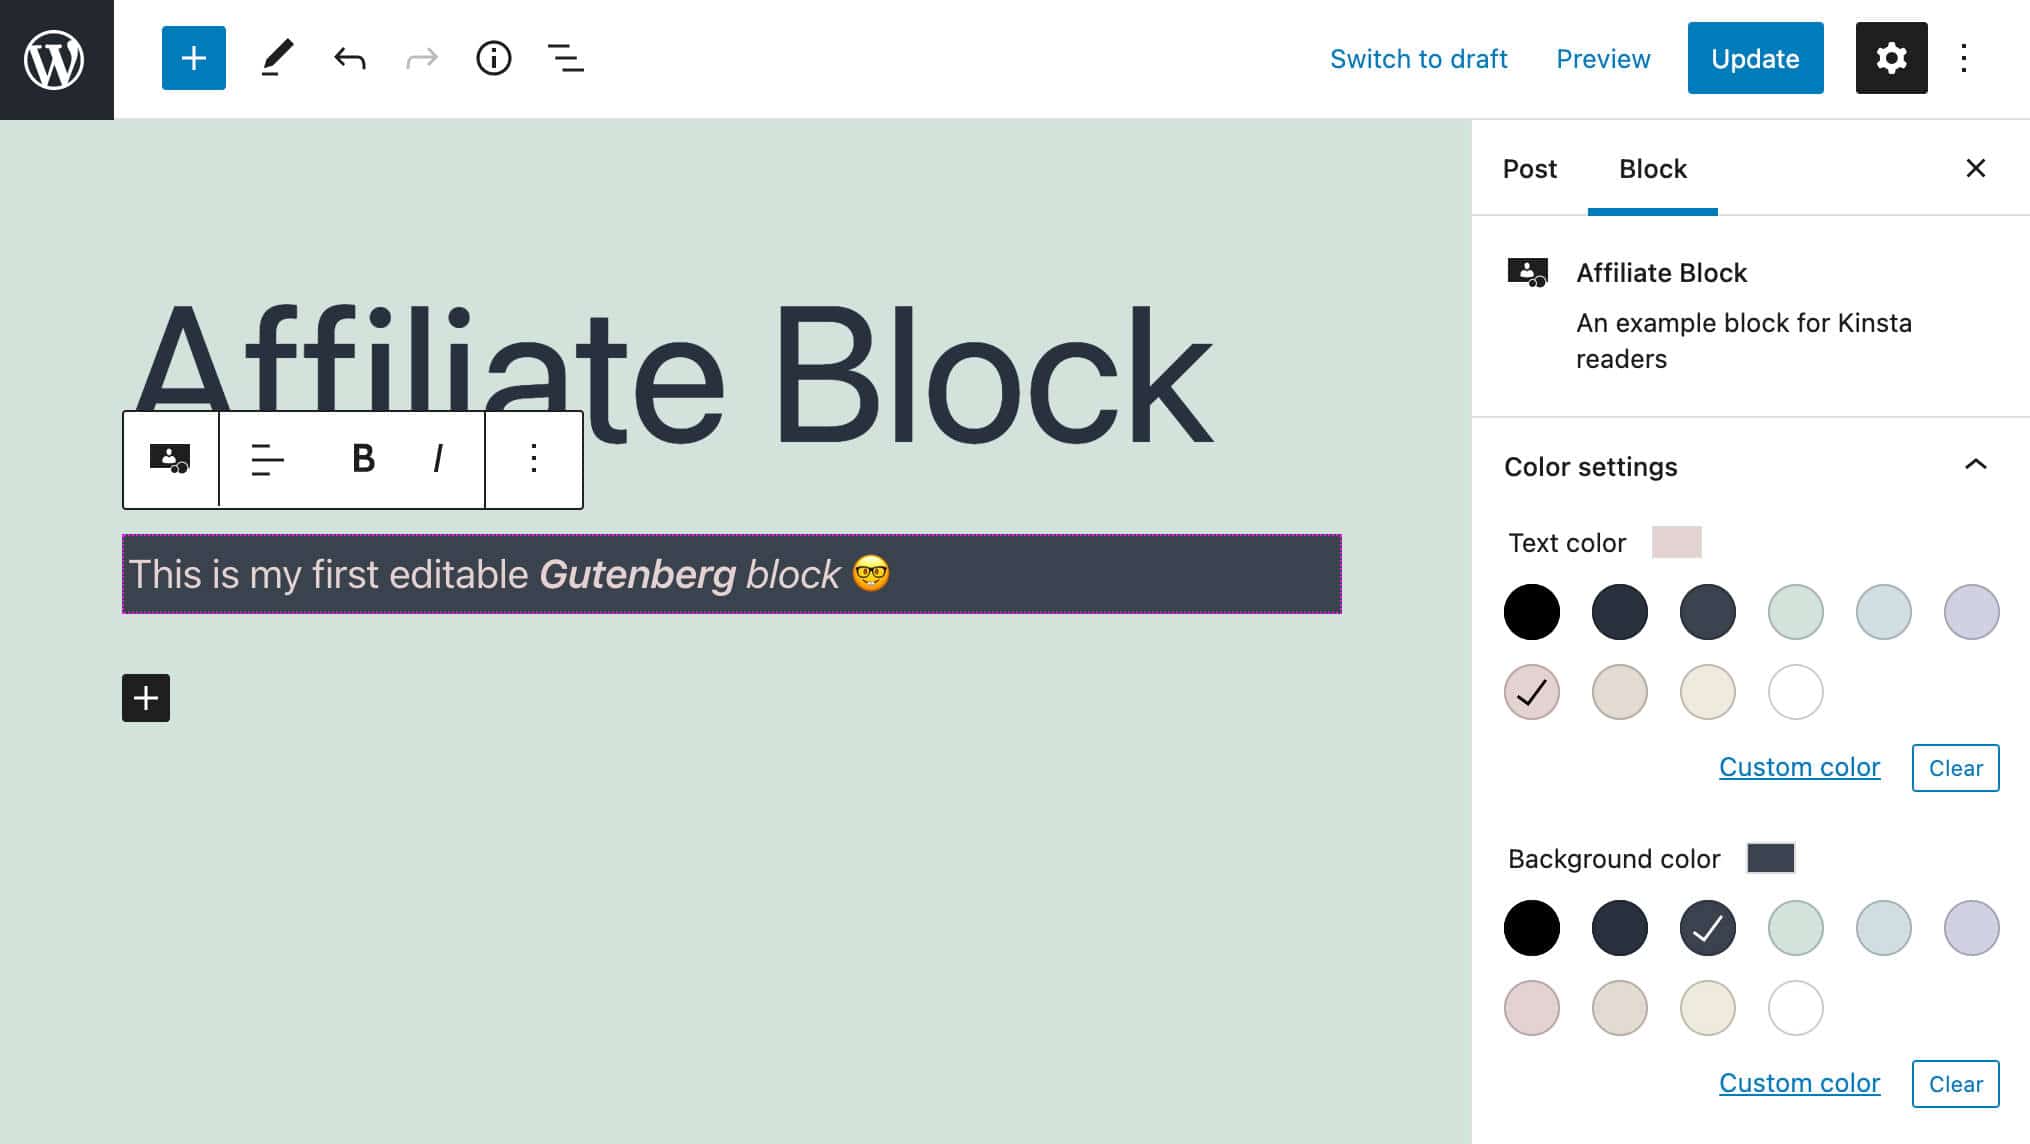
} from '@wordpress/block-editor';7.2. Thay đổi return của edit.js với component mới
export default function Edit( { attributes, setAttributes } ) {
	const blockProps = useBlockProps();
	const onChangeContent = ( newContent ) => {
		setAttributes( { content: newContent } )
	}
	const onChangeAlign = ( newAlign ) => {
		setAttributes( {
			align: newAlign === undefined ? 'none' : newAlign,
		} )
	}
	return (
		<>
			<InspectorControls>
				<PanelColorSettings
					title={ __( 'Color settings', 'my-affiliate-block' ) }
					initialOpen={ false }
					colorSettings={ [
						{
						  value: textColor,
						  onChange: onChangeTextColor,
						  label: __( 'Text color', 'my-affiliate-block' ),
						},
						{
						  value: backgroundColor,
						  onChange: onChangeBackgroundColor,
						  label: __( 'Background color', 'my-affiliate-block' ),
						}
					] }
				/>
			</InspectorControls>
			<BlockControls>
				<AlignmentControl
					value={ attributes.align }
					onChange={ onChangeAlign }
				/>
			</BlockControls>
			<RichText
				{ ...blockProps }
				tagName="p"
				onChange={ onChangeContent }
				allowedFormats={ [ 'core/bold', 'core/italic' ] }
				value={ attributes.content }
				placeholder={ __( 'Write your text...', 'my-affiliate-block' ) }
				style={ { textAlign: align, backgroundColor: backgroundColor, color: textColor } }
			/>
		</>
	);
}
Chú ý đã có sự thay đổi với component RichText với sự thuộc tính style.
7.3. Thêm Attributes vào block.json
"attributes": {
	"content": {
		"type": "string",
		"source": "html",
		"selector": "p"
	},
	"align": {
		"type": "string",
		"default": "none"
	},
	"backgroundColor": {
		"type": "string"
	},
	"textColor": {
		"type": "string"
	}
},
7.4. Xử lý xự kiện bằng cách thêm vào file edit.js
const onChangeBackgroundColor = ( newBackgroundColor ) => {
	setAttributes( { backgroundColor: newBackgroundColor } )
}
const onChangeTextColor = ( newTextColor ) => {
	setAttributes( { textColor: newTextColor } )
}
7.5. Xử lý dữ liệu lưu trữ
export default function save( { attributes } ) {
	const blockProps = useBlockProps.save();
	const { content, align, backgroundColor, textColor } = attributes;
	return (
		<RichText.Content
			{ ...blockProps }
			tagName="p"
			value={ content }
			style={ { textAlign: align, backgroundColor: backgroundColor, color: textColor } }
		/>
	);
}
Quay lại chạy lện npm run start
Bước 8: Tạo External Link cho button
8.1. Import components từ @wordpress/components vào edit.js
import {
	TextControl,
	PanelBody,
	PanelRow,
	ToggleControl,
	ExternalLink
} from '@wordpress/components';- PanelBody thêm một vùng chứa có thể thu gọn vào thanh cài đặt. bên cạnh
- PaneRow tạo một vùng chứa chung cho các điều khiển thanh bên.
- TextControl cung cấp một điều khiển nhập text input.
- ToggleControl cung cấp một nút chuyển đổi cho phép người dùng lựa chọn bật / tắt
- ExternalLink là một thành phần đơn giản để thêm một liên kết bên ngoài.
8.2. Return element ExternalLink vào edit.js
Đặt cùng cấp với element RichText
<div { ...blockProps }>
	<RichText
		...
	/>
	<ExternalLink
		href={ affiliateLink }
		className="affiliate-button"
		rel={ hasLinkNofollow ? "nofollow" : "" }
	>
			{ linkLabel }
	</ExternalLink>

</div>
Sau đó thêm setting vào block sidebar bằng element PanelBody trong InspectorControls
<InspectorControls>
	<PanelColorSettings
	...
	/>
	<PanelBody
		title={ __( 'Link Settings', 'my-affiliate-block' )}
		initialOpen={true}
	>
	...
	</PanelBody>
</InspectorControls>
Tiếp theo chúng ta thêm 2 PanelRow trong PanelBody giúp người dùng có thể cài đặt label và url
<PanelBody
	title={ __( 'Link Settings', 'my-affiliate-block' )}
	initialOpen={true}
>
	<PanelRow>
		<fieldset>
			<TextControl
				label={__( 'Affiliate link', 'my-affiliate-block' )}
				value={ affiliateLink }
				onChange={ onChangeAffiliateLink }
				help={ __( 'Add your affiliate link', 'my-affiliate-block' )}
			/>
		</fieldset>
	</PanelRow>
	<PanelRow>
		<fieldset>
			<TextControl
				label={__( 'Link label', 'my-affiliate-block' )}
				value={ linkLabel }
				onChange={ onChangeLinkLabel }
				help={ __( 'Add link label', 'my-affiliate-block' )}
			/>
		</fieldset>
	</PanelRow>
</PanelBody>
Bây giờ chúng ta thêm một điều kiện xuất hiện bằng ToggleControl để người dùng tắt/ bật
<PanelRow>
	<fieldset>
		<ToggleControl
			label="Add rel = nofollow"
			help={
				hasLinkNofollow
					? 'Has rel nofollow.'
					: 'No rel nofollow.'
			}
			checked={ hasLinkNofollow }
			onChange={ toggleNofollow }
		/>
	</fieldset>
</PanelRow>
8.3. Thêm thuộc tính cho block.json
"affiliateLink": {
	"type": "string",
	"default": ""
},
"linkLabel": {
	"type": "string",
	"default": "Check it out!"
},
"hasLinkNofollow": {
	"type": "boolean",
	"default": false
}
8.4. Thêm hàm xử lý sự kiện vào edit.js
const onChangeAffiliateLink = ( newAffiliateLink ) => {
	setAttributes( { affiliateLink: newAffiliateLink === undefined ? '' : newAffiliateLink } )
}

const onChangeLinkLabel = ( newLinkLabel ) => {
	setAttributes( { linkLabel: newLinkLabel === undefined ? '' : newLinkLabel } )
}

const toggleNofollow = () => {
	setAttributes( { hasLinkNofollow: ! hasLinkNofollow } )
}
8.5. Lưu dữ liệu ở file save.js
export default function save( { attributes } ) {

	const { align, content, backgroundColor, textColor, affiliateLink, linkLabel, hasLinkNofollow } = attributes;

	const blockProps = useBlockProps.save();

	return (
		<div { ...blockProps }>
			<RichText.Content
				tagName="p"
				value={ content }
				style={ { backgroundColor: backgroundColor, color: textColor } }
			/>
			<p>
				<a
					href={ affiliateLink }
					className="affiliate-button"
					rel={ hasLinkNofollow ? "nofollow" : "noopener noreferrer" }
				>
					{ linkLabel }
				</a>
			</p>
		</div>
	);
}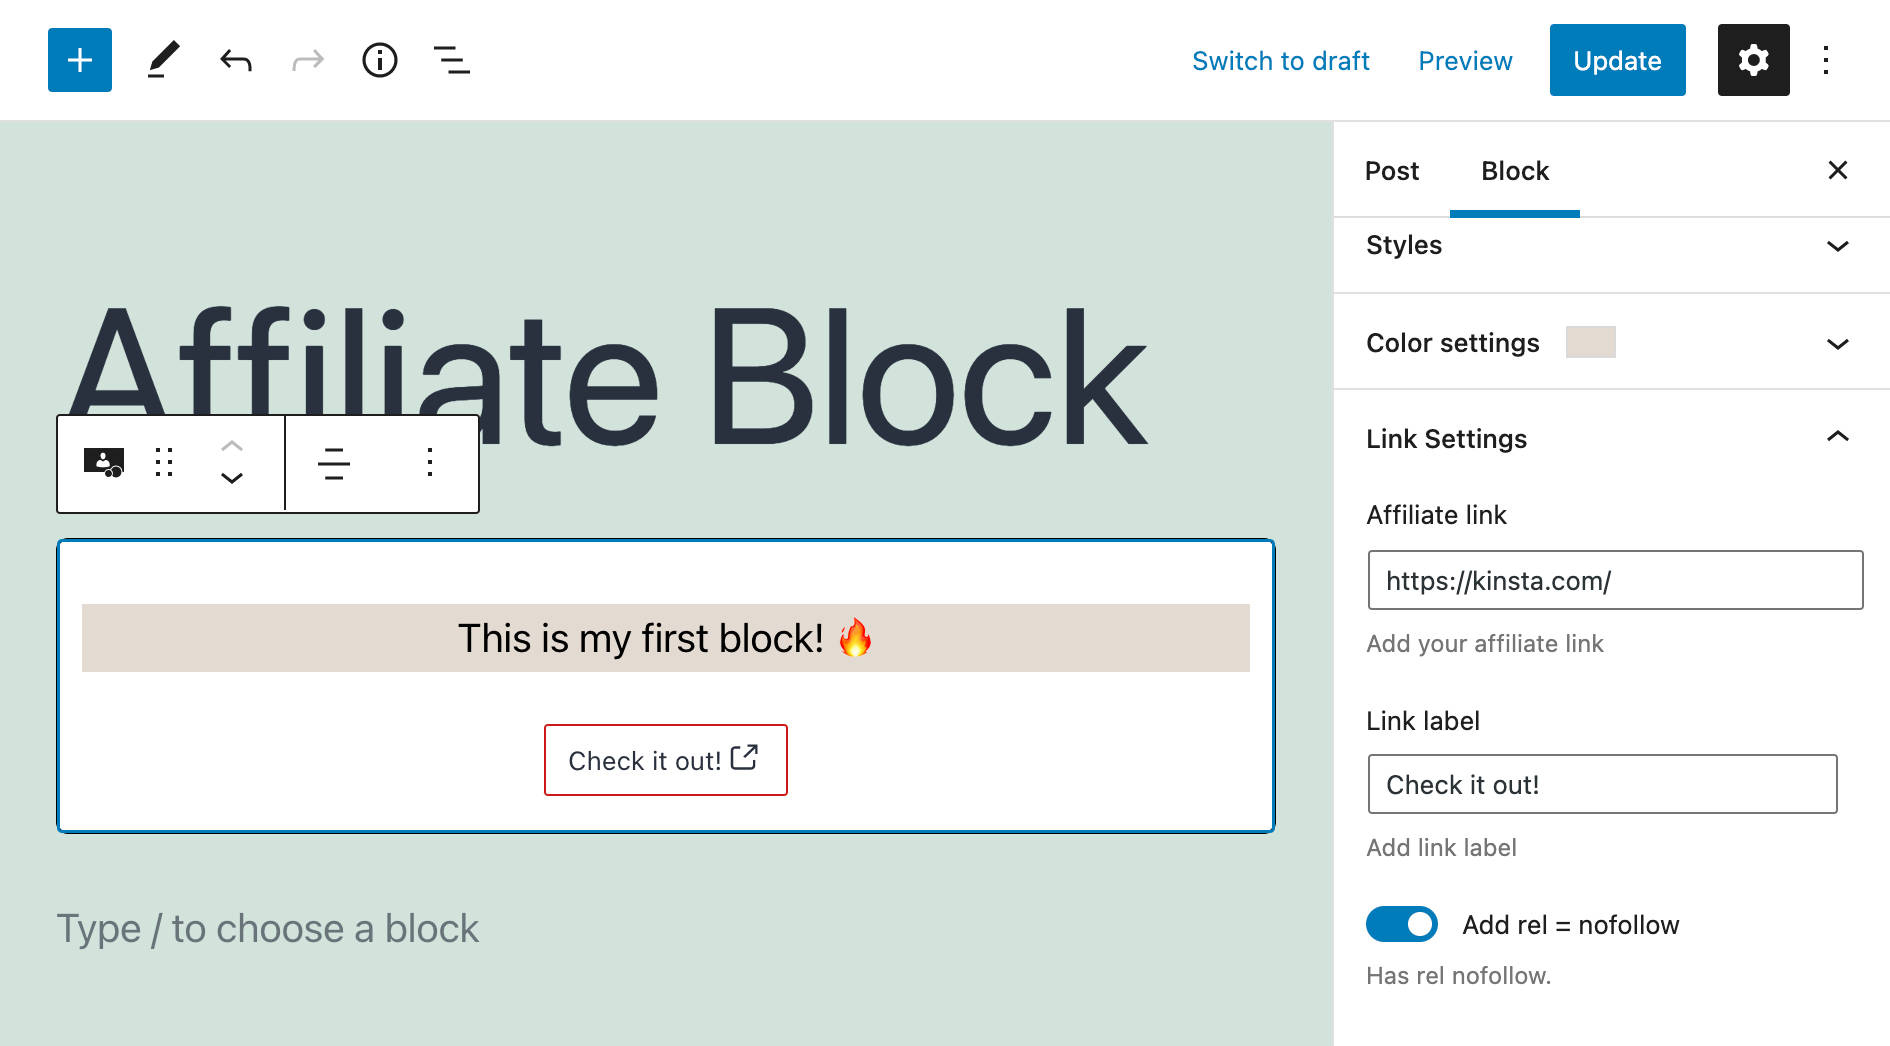
Tới đây bạn sẽ được kết quả như hình trên.
Bước 9 : Thêm Block Style
9.1. Thêm style cho block tại file block.json
"styles": [
	{
		"name": "default",
		"label": "Default",
		"isDefault": true
	},
	{
		"name": "border",
		"label": "Border"
	}
],
Với điều bạn vừa thêm một style mặc định và một kiểu bổ sung được gọi là Border. Bây giờ quay lại editor để nhìn thấy sự thay đổi
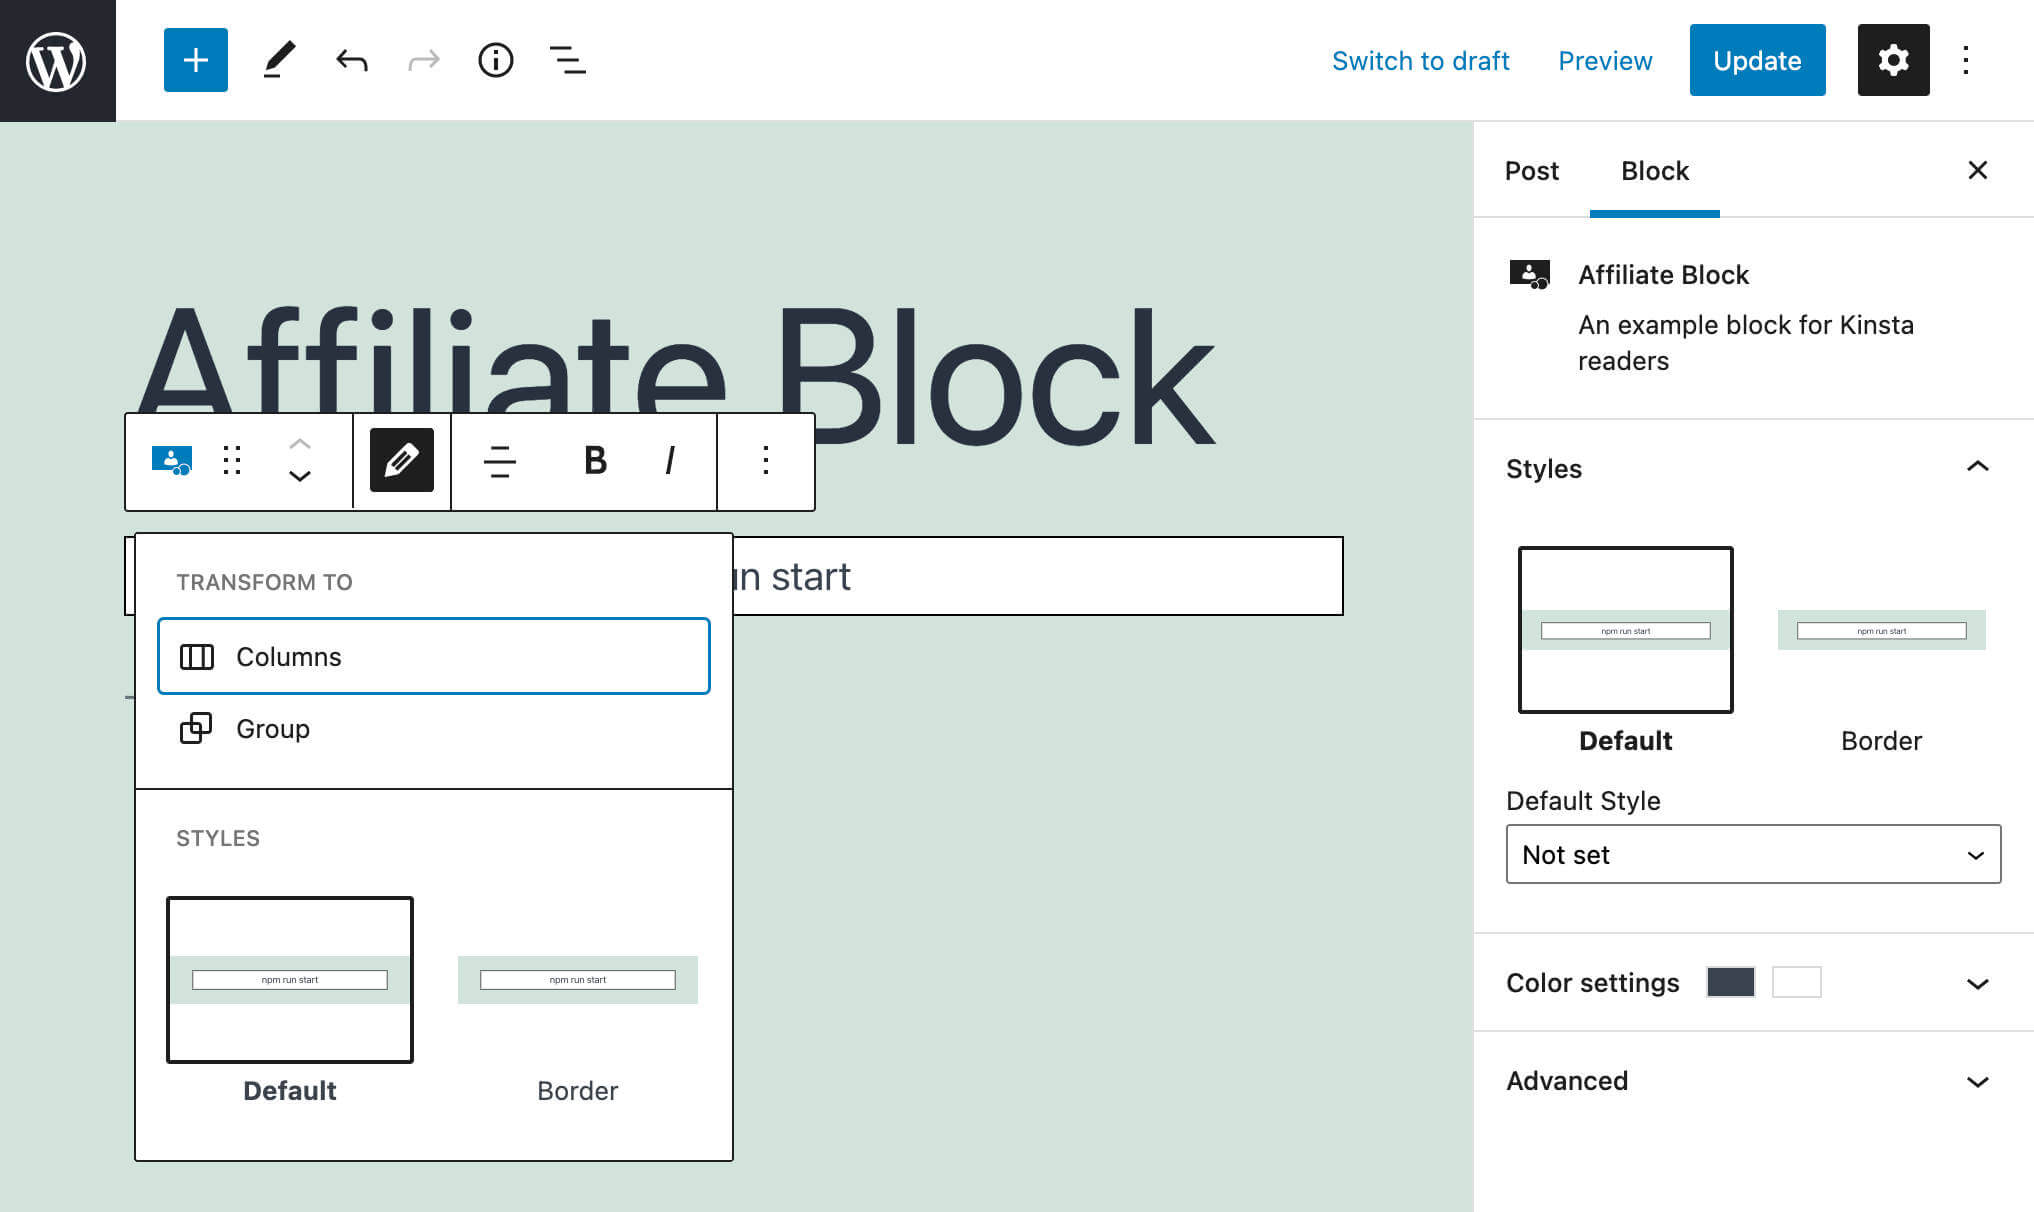
Tại đây bạn có thể chọn lựa bằng Styles panel trong Block Settings Sidebar.
Khi chọn 1 style, thẻ p sẽ có sự thay đổi về class theo định dạng
is-style-{style-name}9.2. Thay đổi style trong editor.scss và style.scss
Với editor.scss
.wp-block-my-affiliate-plugin-my-affiliate-block {
	padding: 2px;
	&.is-style-default{
		border: 0;
	}
	&.is-style-border{
		border: 1px solid #000;
	}
}
và style.scss
.wp-block-my-affiliate-plugin-my-affiliate-block {
	&.is-style-default{
		border: 0;
	}
	&.is-style-border{
		border: 1px solid #000;
	}
}
Sau đó sử dụng lệnh npm run start để kiểm tra style đã thay đổi
Bước 10: Lồng các Gutenberg Block với nhau bằng component InnerBlocks
Affiliate Block mặc dù đã có đầy đủ tính năng, nhưng vẫn chưa hay lắm. Vậy nên bước này sẽ giới thiệu bạn cách làm cho nó có thể tạo được colum và upload ảnh bằng cách lồng block với nhau.
10.1. Tạo file container.js và import đến index.js
import './container';trong file container.js bạn import các component
import { registerBlockType } from "@wordpress/blocks";
import { __ } from "@wordpress/i18n";
import {
	useBlockProps,
	InnerBlocks
} from "@wordpress/block-editor";
Bước tiếp theo là tạo một template mẫu cung cấp cấu trúc mà các block sẽ được đặt bên trong.
Trong ví dụ này, chúng ta tạo một template bao gồm hai cột chứa block Hình ảnh cốt lõi và block Đơn vị liên kết tùy chỉnh ở trên:
const TEMPLATE = [ [ 'core/columns', { backgroundColor: 'yellow', verticalAlignment: 'center' }, [
	[ 'core/column', { templateLock: 'all' }, [
		[ 'core/image' ],
	] ],
	[ 'core/column', { templateLock: 'all' }, [
		[ 'my-affiliate-plugin/my-affiliate-block', { placeholder: 'Enter side content...' } ],
	] ],
] ] ];
Xem thêm Block Template tại đây.
10.2. Tạo block cho Template trong container.js
registerBlockType('my-affiliate-plugin/my-affiliate-container-block', {
	title: __( 'Container', 'my-affiliate-block' ),
	category: 'design',

	edit( { className } ) {

		return(
			<div className={ className }>
				<InnerBlocks
					template={ TEMPLATE }
					templateLock="all"
				/>
			</div>
		)
	},

	save() {
		const blockProps = useBlockProps.save();
		return(
			<div { ...blockProps }>
				<InnerBlocks.Content />
			</div>
		)
	},
});
Vì phạm vi bài viết có giới hạn nên chỉ giới thiệu đến đây, bạn có thể xem chi tiết bài viết tại đây với các hướng dẫn còn lại với các thành phần khác hoặc xem full code trong link này.
Đây chỉ là bài học đơn giản tạo một Gutenberg block, sau khi bạn hiểu cơ bản bạn có thể phát triển thành bất cứ block nào bạn thích.