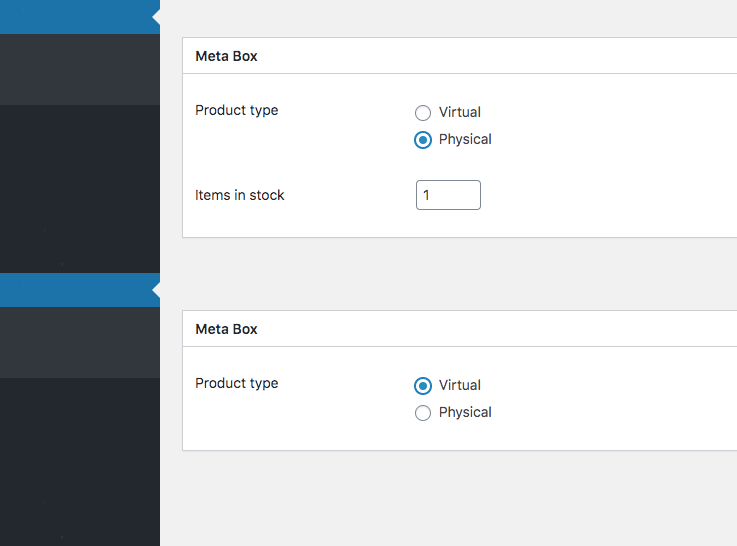
Trong bài viết này, tôi sẽ hướng dẫn bạn tạo một metabox có điều kiện trong WordPress - Metabox sẽ hiển thị hoặc ẩn một trường tùy thuộc vào giá trị của trường khác trong WordPress đơn giản.
Image

Bước 1: Tạo một Metabox WordPress
1.1. Tạo một Metabox bằng cách thêm vào functions.php đoạn code bên dưới
// Tạo metabox cho product
add_action( 'add_meta_boxes', 'devwk_add_product_metabox' );

function devwk_add_product_metabox() {

	add_meta_box( 'devwk_product_metabox', 'Meta Box', 'devwk_callback', 'product', 'normal', 'default' );

}

function devwk_callback( $post ) {

	$product_type = get_post_meta( $post->ID, 'product_type', true );
	$items_in_stock = get_post_meta( $post->ID, 'items_in_stock', true );

	// you can add a nonce field here as well

	echo '<table class="form-table"><tbody>
		<tr>
			<th>Product type</th>
			<td>
				<p><label><input type="radio" name="product_type"' . checked( $product_type, 'virtual', false) . ' value="virtual"> Virtual</label></p>
				<p><label><input type="radio" name="product_type"' . checked( $product_type, 'physical', false) . ' value="physical"> Physical</label></p>
			</td>
		</tr>
		<tr' . ( 'physical' !== $product_type ? ' style="display:none"' : '' ) . '>
			<th><label for="items_in_stock">Items in stock</label></th>
			<td>
				<input type="number" id="items_in_stock" name="items_in_stock" value="1" class="small-text">
			</td>
		</tr>
	</tbody></table>';

}


// lưu dữ liệu metabox
add_action( 'save_post', 'devwk_save_product_meta', 10, 2 );

function devwk_save_product_meta( $post_id, $post ) {


	//  kiểm tra nonce, quyền người dùng và xác thực loại bài đăng tại đây


	if( isset( $_POST[ 'product_type' ] ) ) {
		update_post_meta( $post_id, 'product_type', sanitize_text_field( $_POST[ 'product_type' ] ) );
	} else {
		delete_post_meta( $post_id, 'product_type' );
	}
	if( isset( $_POST[ 'items_in_stock' ] ) ) {
		update_post_meta( $post_id, 'items_in_stock', intval( $_POST[ 'items_in_stock' ] ) );
	} else {
		delete_post_meta( $post_id, 'items_in_stock' );
	}

	return $post_id;

}
Để đơn giản hóa, ở trên đã không thêm bất kỳ kiểm tra nonce, quyền người dùng và xác thực loại bài đăng nào vào hàm devwk_save_product_meta(). Nhưng tốt hơn là bạn nên thêm nó vào.
Ở trên ví dụ này là sử dụng post type là product, bạn có thể thay đổi với post type phù hợp mà bạn muốn.
Bước 2: Thêm đoạn code JavaScript để hiển thị/ ẩn khi thỏa điều kiện
2.1. Đầu tiên bạn khai báo file custom.js vào trong functions.php của child theme của bạn như sau
add_action( 'admin_enqueue_scripts', 'devwk_custom_js' );
function devwk_custom_js(){
	// please create also an empty JS file in your theme directory and include it too
	wp_enqueue_script('custom', get_stylesheet_directory_uri() . '/custom.js', array( 'jquery') );

}
2.2. Sau đó tạo một file custom.js trong thư mục child theme của bạn và thêm đoạn code JS bên dưới.
jQuery( function( $ ) {

	$( 'input[name="product_type"]' ).change( function() {
		var val = $(this).val();
		if( 'physical' == val ) {
			$( '#items_in_stock' ).parent().parent().show();
		} else {
			$( '#items_in_stock' ).parent().parent().hide();
		}
	});

} );
Hy vọng bài viết có thể giúp ích được bạn


